Showing posts with label java script. Show all posts

How To Add Smart Jquery Featured Slider to Blogger/Websites


This is a another tutorial about, how to add great featured jquery content slider to your blogger blog or other website.Read the instruction given below to add this featured content slider to your blog with in few minutes.Remember to use 307px width and 254px height images for this slider.I recommend to DOWNLOAD java script files and host it yourself.Also you can see the DEMO of this slider HERE.

1.Login to your blogger dashboard--> Design - -> Edit HTML.

2.Scroll down to where you see tag .

3.Copy below code and paste it just before the tag .


4.Now save your template.

5.Go to Layout --> Page Elements.

6.Click on 'Add a Gadget'.

7.Select 'HTML/Javascript' and add the code given below:


NOTE : Replace,

SLIDE-X-LINK-HERE with your real featured posts links.

SLIDE-X-IMAGE-ADDRESS-HERE with your real slide images addresses.

Look at the example below:


You are done.


How To Create JQuery Featured Content Slideshow


In this tutorial I am going to explain,how to create a slideshow to show your featured content to visitors.This is very easy to add and configure.This slideshow is working using jquery.You do not want to host any java script file yourself to add this slideshow to your blog.So you can add this slideshow to your site with in few minutes.Default width=600px and height=240px.But you can change it easily to match it for your website.

If you like add this slideshow to your blogger blog or website,then follow the steps given below.


1.Login to your blogger dashboard--> Design - -> Edit HTML.

2.Scroll down to where you see tag .

3.Copy below code and paste it just before the tag .


4.Now save your template.

5.Go to Layout --> Page Elements.

6.Click on 'Add a Gadget'.

7.Select 'HTML/Javascript' and add the code given below:


You can add more slides as you like.

Note : Replace images URLs,"This is featured post X title","Replace This Text With Your Featured Post X Description" with your content.

You are done.


How To Add Random,Rotating Images for Blogger Header


In this tutorial I am going to explain how to add random,rotating images for your blogger header background.When after you adding this feature to your blogger blog,header image of your blog will rotate/change in each page refresh.Before doing this trick you must create header images for your blog.In this tutorial I am going to show how to rotate 5 header images.

1.Log in to your dashboard--> Design- -> Edit HTML

2.Scroll down to where you see tag.

3.Now copy below code and paste it just after the tag.


NOTE :

Replace "URL-OF-HEADER-IMAGE-X" with your image URLs.

If above code doesn't work for your blog,then replace "#header-wrapper" with "#header".(ID or Class of your header section).

You can add different number of images than 5.But remember to change "4*Math.random()" according to the number of images you add.For example,when you want to add 8 different images for your blog header background, then code should be change as "7*Math.random()".Look at the example below:


4.Now save your template and your done.Refresh your site few times to see the result.Your header image will be rotate.


Mootools Featured Posts Auto Slider to Blogger/Websites


This tutorial will show you how to add Mootools Featured Posts Slider into blogger or any other web site.You can look at the DEMO page of this Mootools Featured Posts Slider.Now if you like to add this slider to your site then follow the steps given below.

1.Login to your blogger dashboard--> layout- -> Edit HTML

2.Scroll down to where you see tag .

3.Copy below code and paste it just before the tag .


NOTE : You can DOWNLOAD and HOST mootools-1.2.1-core-yc.js yourself.Andalso you can change width and height of this slider easily (Default width:515px and height:250px;).

4.Now save your template.

5.Go to Layout --> Page Elements.

6.Click on 'Add a Gadget'.

7.Select 'HTML/Javascript' and add the code given below and click save.


ENTER-YOUR-POST-1-LINK-HERE">THIS-IS-FEATURED-POST-1-TITLE


FEATURED-POST-1-DESCRIPTION


FEATURED-POST-1-IMAGE-ADDRESS" class="full" alt="" />


ENTER-YOUR-POST-LINK-2-HERE">THIS-IS-FEATURED-POST-2-TITLE


FEATURED-POST-2-DESCRIPTION


FEATURED-POST-2-IMAGE-ADDRESS" class="full" alt="" />


ENTER-YOUR-POST-3-LINK-HERE">THIS-IS-FEATURED-POST-3-TITLE


FEATURED-POST-3-DESCRIPTION


FEATURED-POST-3-IMAGE-ADDRESS" class="full" alt="" />


ENTER-YOUR-POST-4-LINK-HERE">THIS-IS-FEATURED-POST-4-TITLE


FEATURED-POST-4-DESCRIPTION


FEATURED-POST-4-IMAGE-ADDRESS" class="full" alt="" />


ENTER-YOUR-POST-5-LINK-HERE">THIS-IS-FEATURED-POST-5-TITLE


FEATURED-POST-5-DESCRIPTION


FEATURED-POST-5-IMAGE-ADDRESS" class="full" alt="" />


Change 5000 to change your slider speed.

NOTE : Remember to replace ,

ENTER-YOUR-POST-X-LINK-HEREs with your real post links.

THIS-IS-FEATURED-POST-X-TITLEs with your real post titles.

FEATURED-POST-X-DESCRIPTIONs with your post descriptions.

FEATURED-POST-X-IMAGE-ADDRESSs with your real image addresses.

Look at the example below.


This is featured post 1 title


Lorem ipsum dolor sit amet, consectetuer adipiscing elit. Aenean commodo ligula eget dolor. Aenean massa. Cum sociis natoque penatibus et...


This is featured post 2 title


Lorem ipsum dolor sit amet, consectetuer adipiscing elit. Aenean commodo ligula eget dolor. Aenean massa. Cum sociis natoque penatibus et...


This is featured post 3 title


Lorem ipsum dolor sit amet, consectetuer adipiscing elit. Aenean commodo ligula eget dolor. Aenean massa. Cum sociis natoque penatibus et...


This is featured post 4 title


Lorem ipsum dolor sit amet, consectetuer adipiscing elit. Aenean commodo ligula eget dolor. Aenean massa. Cum sociis natoque penatibus et...


This is featured post 5 title


Lorem ipsum dolor sit amet, consectetuer adipiscing elit. Aenean commodo ligula eget dolor. Aenean massa. Cum sociis natoque penatibus et...


You are done.


How To Add JQuery Lazy Load Plugin to Blogger


This post will explain to you how to add JQuery Lazy Load Plugin to your blogger blog or any other website easily.If you have a blog or website containing many images, this tricks will be very helpful to you.It can reduce the page loading time of your site.You can see more details about this JQuery Lazy Load Plugin from here: http://www.appelsiini.net/projects/lazyload.Look at the DEMO page to see the result.

Lazy loader is a jQuery plugin written in JavaScript. It delays loading of images in (long) web pages. Images outside of viewport (visible part of web page) wont be loaded before user scrolls to them. Using lazy load on long web pages containing many large images makes the page load faster. Browser will be in ready state after loading visible images. In some cases it can also help to reduce server load.


To add JQuery Lazy Load Plugin to your blogger blog or any other website follow the steps given below:


1.Login to your blogger dashboard--> layout- -> Edit HTML

2.Scroll down to where you see tag .

3.Copy below code and paste it just before the tag .


Note : You can download javascript files from here if you want to host above files yourself.

4.Now save your template and you are done.Refresh your site to see the result.


Smooth Jquery Featured Post Slideshow For Blogger


This tutorial will shows you how to add featured content slideshow to show your featured post to your readers.This slideshow is very easy to setup and can easily manage width and height to match your template.Not only that you can change the speed of this slideshow easily.Default width is 550px and Default height is 200px.I think you will love this slideshow.You can see the DEMO of this widget from here.


1.Login to your blogger dashboard--> layout- -> Edit HTML

2.Scroll down to where you see tag .

3.Copy below code and paste it just before the tag .


NOTE : To change the speed of slideshow, change the value 4000.

4.Save your template.

5.Now go to Layout-->Page Element and click on "Add a gadget".

6.Select "html/java script" and add the code given below and click save.


NOTE : Replace YOUR-LINK-HERE and images with your content.

Now you have successfully installed this slide show to your site.


How To Add Featured Auto Content Slider to Blogger


This tutorial will explain to you how to create a auto featured content slider for your blogger blog or website.I found this content slider from Florance wordpress theme(Created by Web2feel.com) and I think, it will be useful to your blogger blog.Before adding this widget to your site look at the DEMO from here.

If you like to add this beautiful auto slider to your blog then follow steps below.

1.Login to your blogger dashboard--> layout- -> Edit HTML

2.Scroll down to where you see tag .

3.Copy below code and paste it just before the tag .


Note : Host trans.png yourself.


4.Now go to Layout-->Page Element and click on "Add a gadget".

5.Select "html/java script" and add the code given below and click save.


Note : Replace YOUR-POST-x-LINK-HERE, YOUR-FEATURED-POST-X-SMALL-DESCRIPTION-HERE [...] and Images Links with your content.
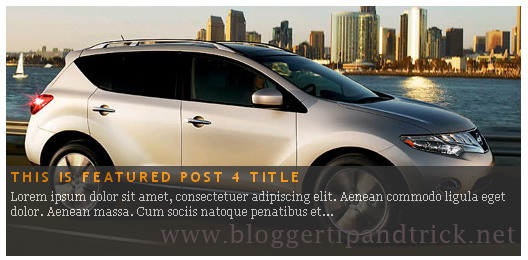
Look at the example below:


  • Lorem ipsum dolor sit amet, consectetuer adipiscing elit. Quisque sed felis. Aliquam sit amet felis. Mauris semper, velit semper laoreet dictum, quam diam dictum urna, nec placerat elit nisl in quam. Etiam augue pede, molestie eget, rhoncus at, convallis ut, eros. Aliquam pharetra. Nulla in tellus eget odio sagittis blandit. Maecenas at nisl. Nullam lorem [...]


  • Lorem ipsum dolor sit amet, consectetuer adipiscing elit. Quisque sed felis. Aliquam sit amet felis. Mauris semper, velit semper laoreet dictum, quam diam dictum urna, nec placerat elit nisl in quam. Etiam augue pede, molestie eget, rhoncus at, convallis ut, eros. Aliquam pharetra. Nulla in tellus eget odio sagittis blandit. Maecenas at nisl. Nullam lorem [...]


  • Lorem ipsum dolor sit amet, consectetuer adipiscing elit. Quisque sed felis. Aliquam sit amet felis. Mauris semper, velit semper laoreet dictum, quam diam dictum urna, nec placerat elit nisl in quam. Etiam augue pede, molestie eget, rhoncus at, convallis ut, eros. Aliquam pharetra. Nulla in tellus eget odio sagittis blandit. Maecenas at nisl. Nullam lorem [...]


  • Lorem ipsum dolor sit amet, consectetuer adipiscing elit. Quisque sed felis. Aliquam sit amet felis. Mauris semper, velit semper laoreet dictum, quam diam dictum urna, nec placerat elit nisl in quam. Etiam augue pede, molestie eget, rhoncus at, convallis ut, eros. Aliquam pharetra. Nulla in tellus eget odio sagittis blandit. Maecenas [...]


  • Lorem ipsum dolor sit amet, consectetuer adipiscing elit. Quisque sed felis. Aliquam sit amet felis. Mauris semper, velit semper laoreet dictum, quam diam dictum urna, nec placerat elit nisl in quam. Etiam augue pede, molestie eget, rhoncus at, convallis ut, eros. Aliquam pharetra. Nulla in tellus eget odio sagittis blandit. Maecenas [...]


  • Lorem ipsum dolor sit amet, consectetuer adipiscing elit. Quisque sed felis. Aliquam sit amet felis. Mauris semper, velit semper laoreet dictum, quam diam dictum urna, nec placerat elit nisl in quam. Etiam augue pede, molestie eget, rhoncus at, convallis ut, eros. Aliquam pharetra. Nulla in tellus eget odio sagittis blandit. Maecenas [...]


Now save your template and you are done.Don't forget to leave a comment,if you have any problem.